Here’s how to make your own template for Thunderwave.
Step 1: Setting Up
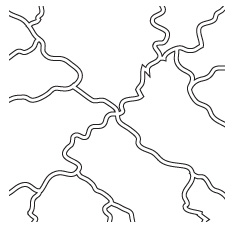
 First thing you need is a shape to work with. I made one using Illustrator, but you can either draw on your paint swatch with a pencil, or print your own copies (you’ll need 2, blown up to 3×3) of mine, pictured below. Now, you could just print my template onto decent cardstock and be done with it, but what I’m doing here is meant to look a little cooler, and be just a bit more durable.
Take 1 each of your dark blue, light blue, and white paint swatches (you can swap the blues out for any other color that you’d like, and the white can be a yellow if that works for you), and cut them down to 3 inches x 3 inches. Next, either mark them up with a pencil, or tape your printouts to the light blue and white swatches.
Step 2: The Cutting
So, you now either have paint swatches with pencil marks all over them, or swatches with printouts of templates taped to them. Take these, and cut along the edges. Be careful! The white lines are extremely thin, and apt to rip. This is the most time consuming and difficult part of the project. You might want to take a break after cutting both the white and light blue, to let your brain recover. Take that time to clean up the scraps, so whoever you’re living with (especially if you live alone) doesn’t murder you later.
Step 3: Assembly
Now that you’ve regained some of your sanity, it’s time to put the thing together. Grab your adhesive (whatever you like best, I like rubber cement, but I leave the choice up to you), and cover the back side of your light blue piece. Line it up with your dark blue piece, and fix it in place. Stick it between two books, and let it dry.
Next, coat the back of the white piece (again, be *EXTREMELY* careful, it could tear), line it up with what you’ve got so far, and stick it on. Again, stick it between two books, and let it dry.
Step 4: Enlarging The Spell
 Border") This next part is a little tough, and not 100% necessary, but boosts your WOW factor just a touch. Enlarge Spell is a feat that boosts the spells range by one. Now, you could very easily plop down the template you’ve made, and tell everybody it’s an inch bigger on two sides, but why force people to imagine it, when we can just throw down the right sized template in any situation?
This next part is a little tough, and not 100% necessary, but boosts your WOW factor just a touch. Enlarge Spell is a feat that boosts the spells range by one. Now, you could very easily plop down the template you’ve made, and tell everybody it’s an inch bigger on two sides, but why force people to imagine it, when we can just throw down the right sized template in any situation?
You’ll want to make three strips at 1×3 of your dark blue swatch, and lay them in a square with a big hole in the middle. You can attach them to each other by putting masking tape over the seams, or gluing them to some of your scraps from previous steps. I personally like the second method, since the pieces tend not to flop around all that much.
Next, measure in 1/2 inch from the side. This will create a lip your main template can rest on. You can then create shapes to extend the light blue and white areas to the edge using whatever you have of those colors. Again, I’ve gone ahead and made an image you can use as a guide.
Attach all these the same way, and your spell’s enarged. There you have it.
Keep ir here for the next time, where I’ll show you how to make a template for Burning Hands, using a similar method. After that, I’m going to try my hand at making walls.
Gallery


Remember, your comments are useful, so let me know, and watch those threatened squares.
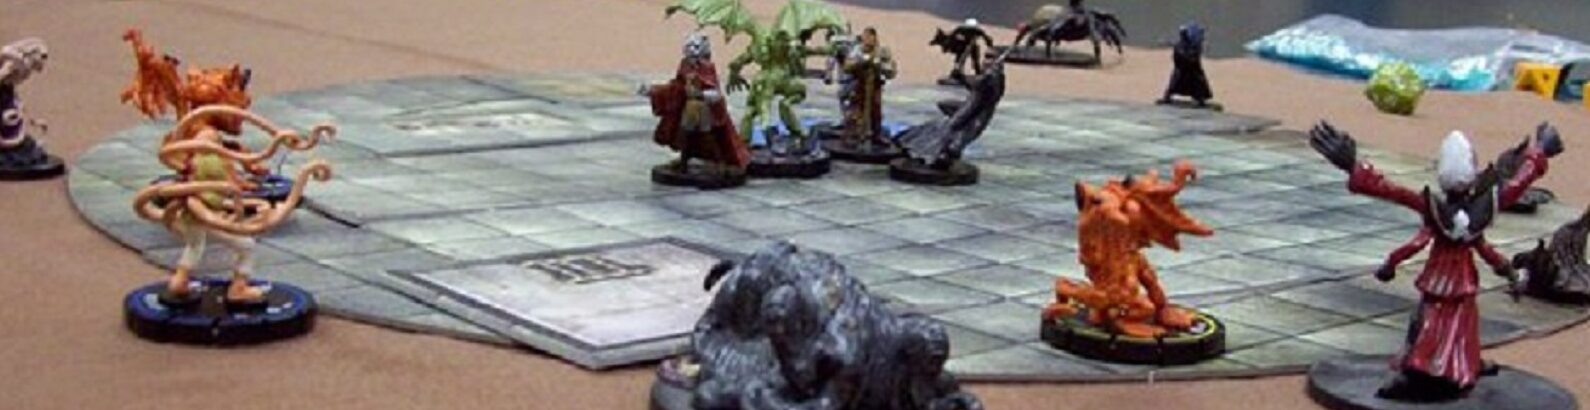
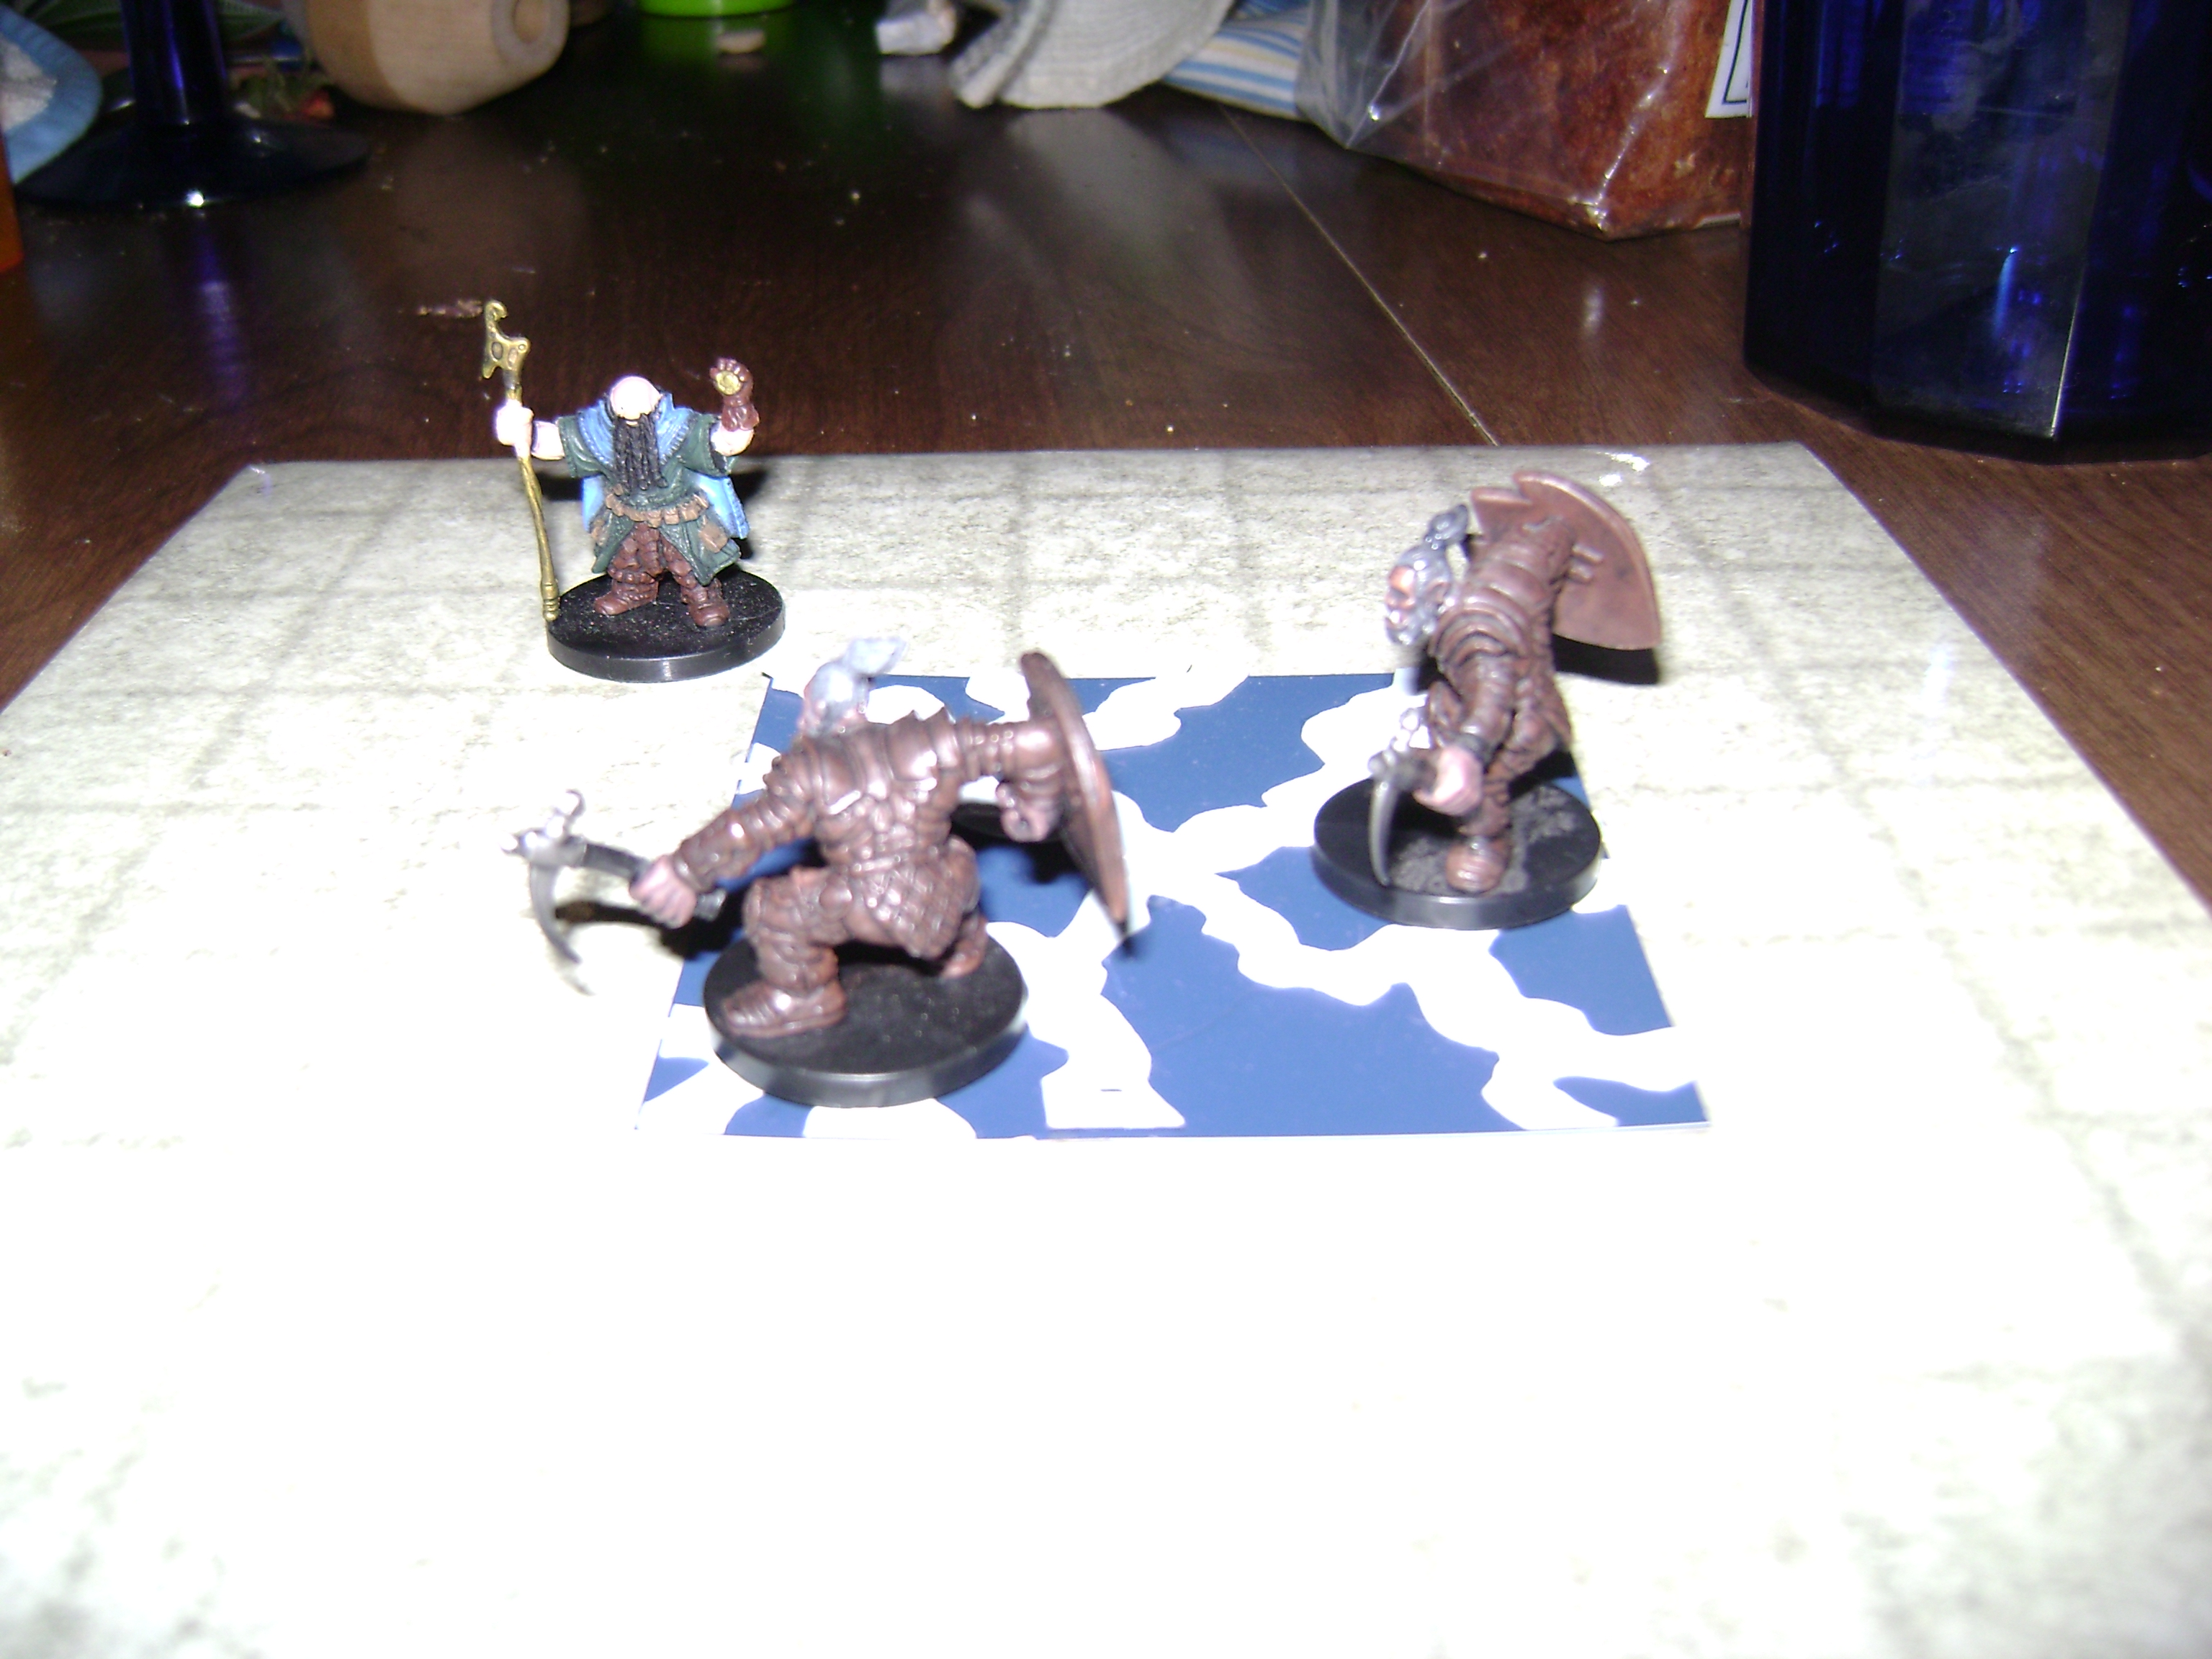
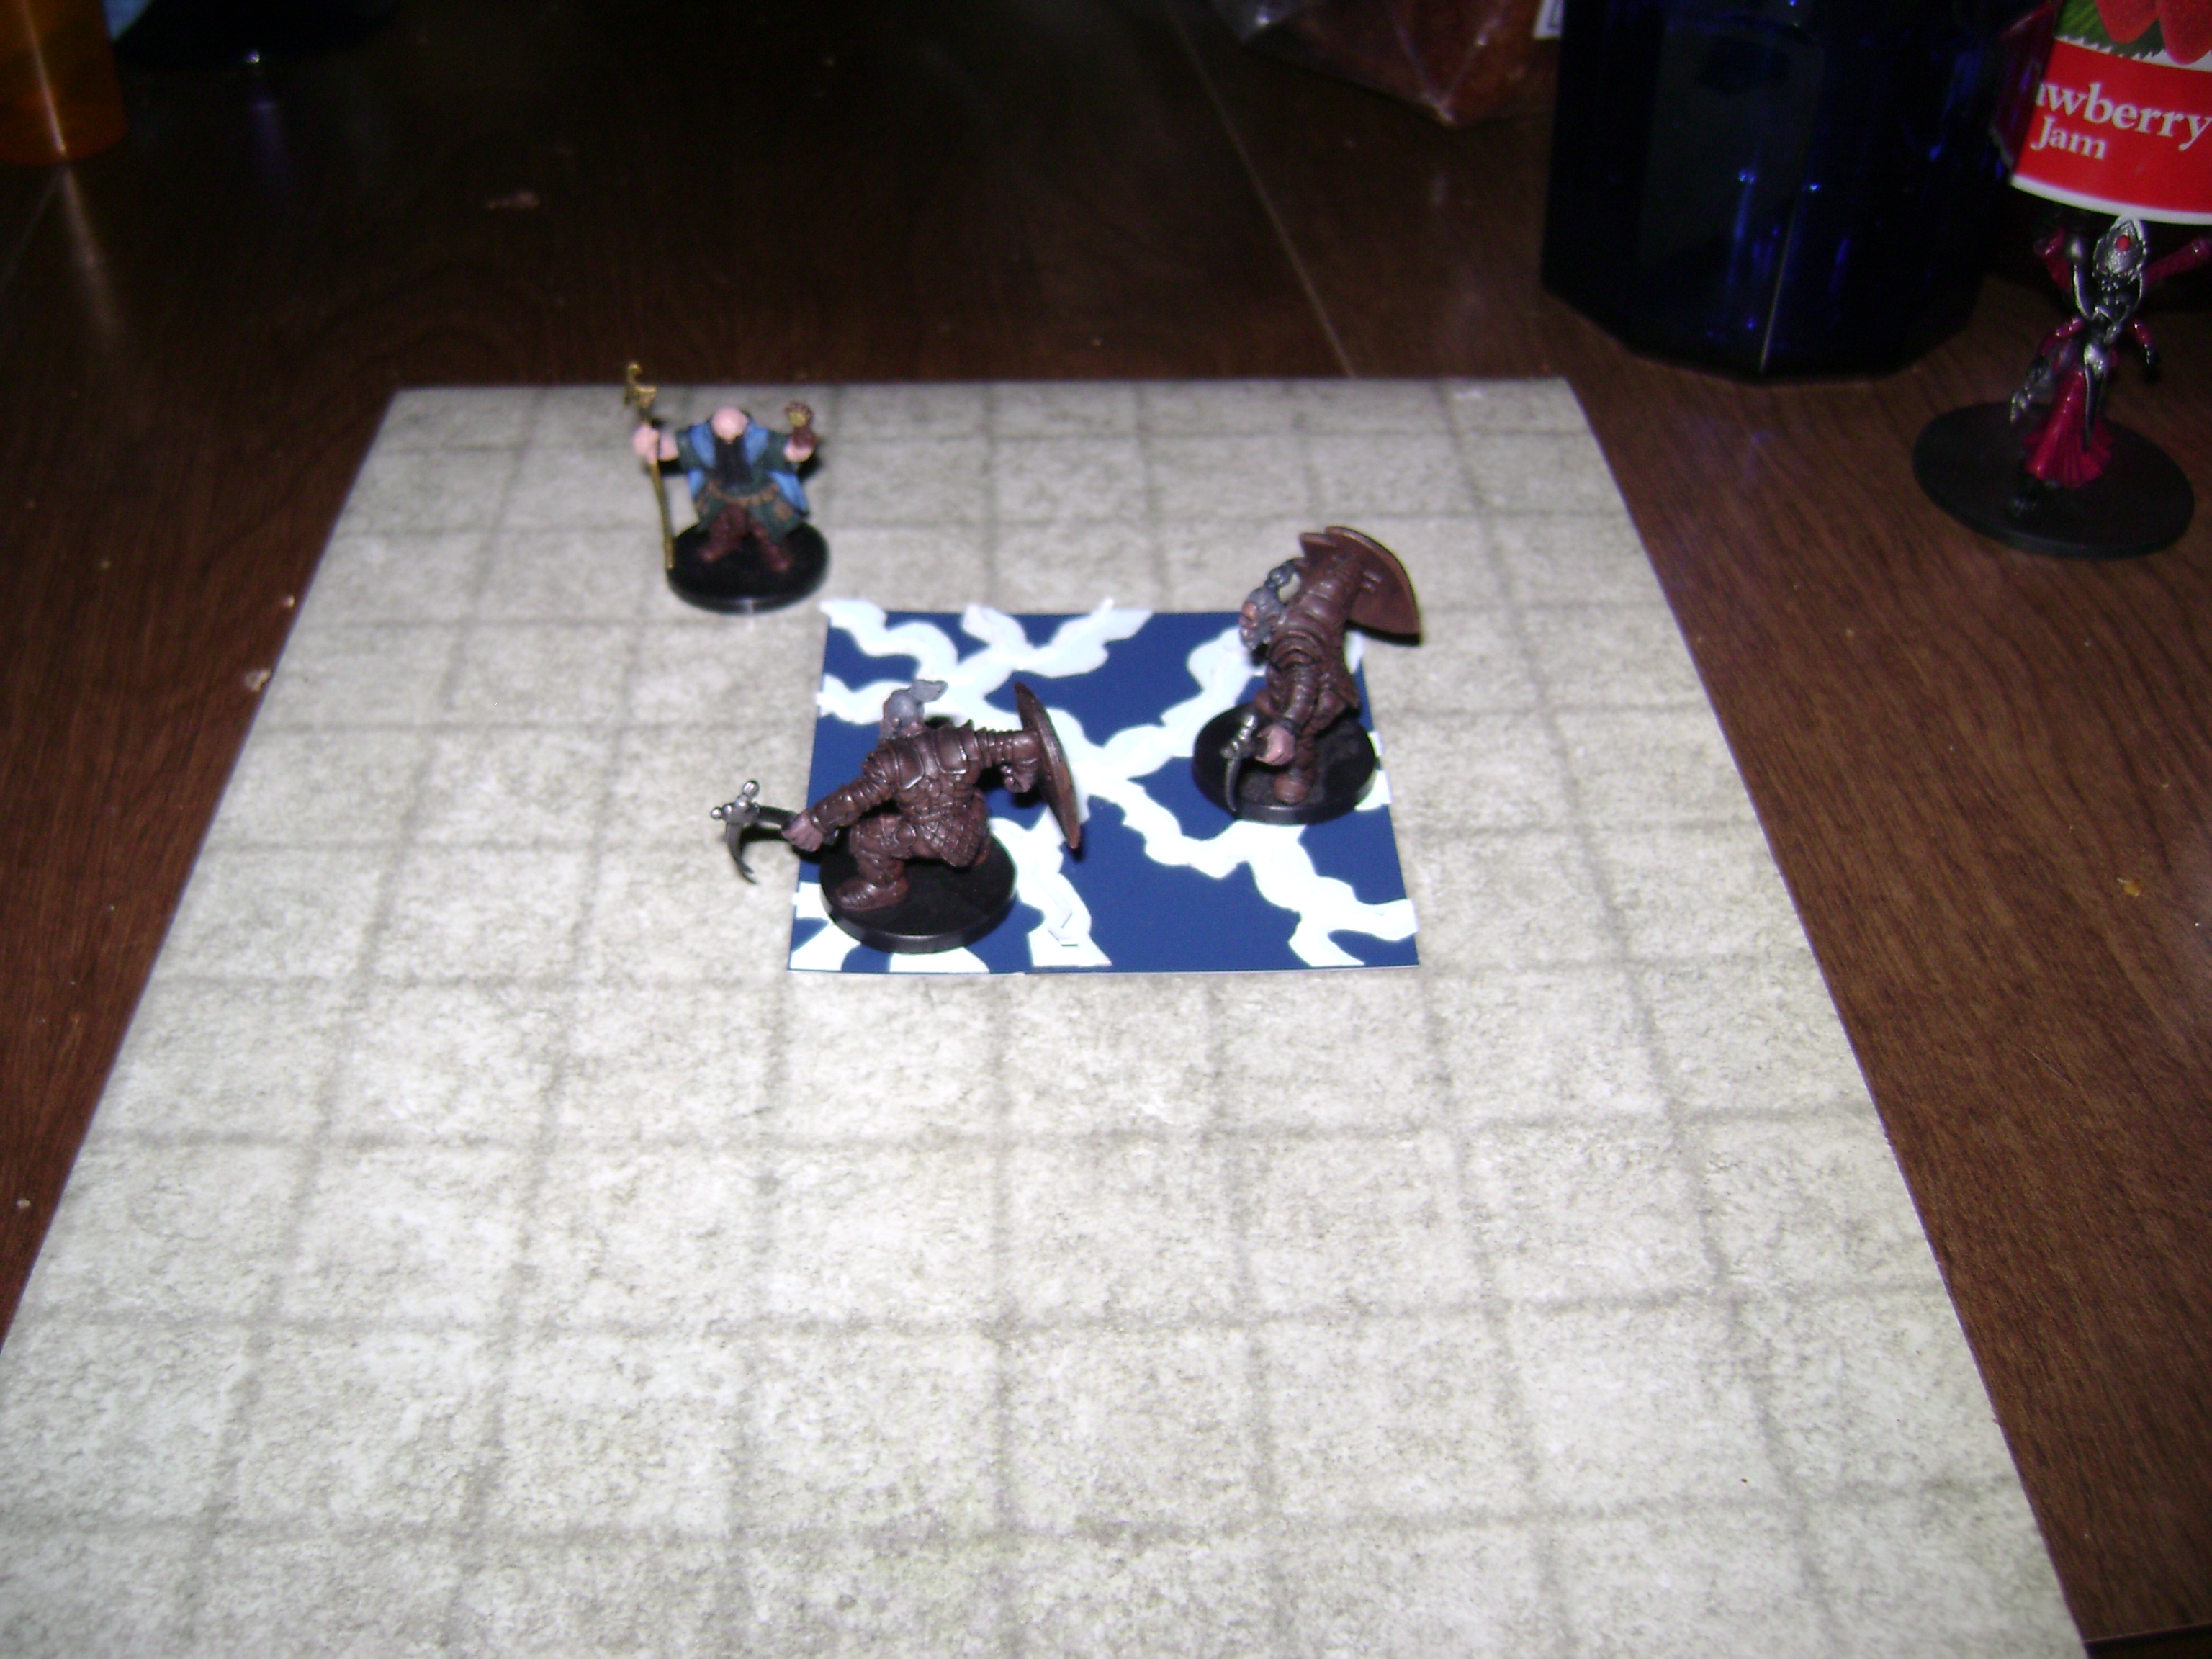
*UPDATE* By request, I added some pictures to the gallery of the actual finished piece, being cast by a Dwarf Wizard on some Hobgoblins.
Why is this needed? TWave doesn’t create a lingering zone.
I don’t think they *are* needed, but then again, neither are minis, maps, tokens, more than one of each die type, etc. It’s about adding to your game. This template is a cool way to show the area covered by the attack rather than the usual “count the squares away from the center” method.
I was going to answer with much the same comment. I have all sorts of stuff that I don’t need at the table – this is just one more thing to look cool and add to the gaming experience. I love stuff like this!
I like this stuff. More please!
I mirror the sentiments of my fellows here, and remind you that just because it’s a throw-and-go type spell, doesn’t mean that having a template here is useless. Also, there are many spells that are sustainable zones, and, hopefully this guide can help with that.
there’s an even quicker way to do this if you desire. Google “Lightning Texture” and then fit/crop/repeat the image as you see fit in order to get the desired result. I use GIMP, and it’s terribly easy. You can do other elements by Google-ing things like fire/flame, ice, cloud(for thunder), sun(radiant), etc etc.
Thanks for the tip! Does that work for straight printouts, or for what I’m going at here, which is a sort of cutout effect?
What would be truly impressive would be to have the base layer be a transparent (or tinted) piece of plastic/perspex. That way you’d be able to see through the template to confirm which models were underneath and have cover.
Perspex would be the most durable option but would mean that you couldn’t construct the template with simple scissors.
Nice idea. I might use a blue piece of tinted plastic/perspex to represent an ice template. I’m not super worried about not being able to see models underneath, since it’s not like there’d ever be sixteen models (assuming a 4×4) under there. I love the idea, though, and if I were going with an option that involves dropping a little money, I’d go with it. Absolutely.
Love the idea, but having a hard time visualizing what you’re talking about without seeing it. Got any pics of the finished product? I’d love to see the actual thing you created in context with minis, gameboard, etc.
@Macadosche – Check the Gallery. I posted a couple of pics messing around with the one I made.