I’ve been using GridMapper for a couple of weeks now, and I’m really enjoying the ability it’s giving me to create dungeon delve style maps. I was asked to write a tutorial about how I use it, so I’m giving it shot.
The great thing about GridMapper is that it allows any RPG game master to get value from it, regardless of system, as long as the system uses squares rather than hexes. If you use it only with its default settings, you can generate maps for your own use behind-the-screen. This tutorial will actually focus on helping those, like myself, who play D&D 4E utilizing miniatures on the 1″ scale, but will probably help anyone else as well.
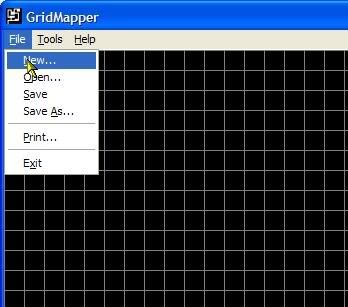
Begin by opening GridMapper and choosing File->New
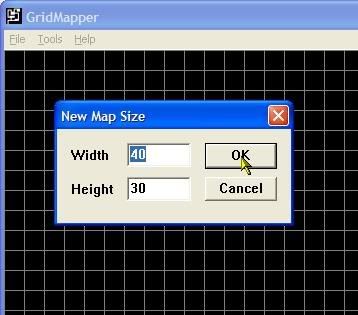
I print out the maps I make and use sticky tack (the white kind which doesn’t leave grease like the blue does) to attach them to Elmer’s Poster Board, available at any arts and crafts store. Those boards are 28″x22″ so the default map size in GridMapper is far too large.
Change the map size from 40×30:
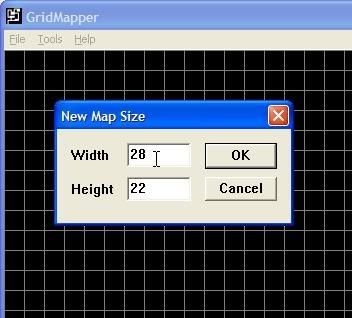
To 28×22:
If you’re planning on printing out your maps, this next step is something you’re definitely going to want to do. When you create a map, it defaults to “filled” floors. What this means is that every square is filled in black. Unless you’re especially rich and can afford to spend lots of money on toner (in which case I’d happily take a sizeable donation, contact me!) you’re going to want to use clear floors, and just build walls. In the case of people who won’t be printing these at 1″ square dimensions, you can keep the “filled” floors, though I’d still do it my way to not waste ink.
Click Tools->Clear Entire Map
![]()
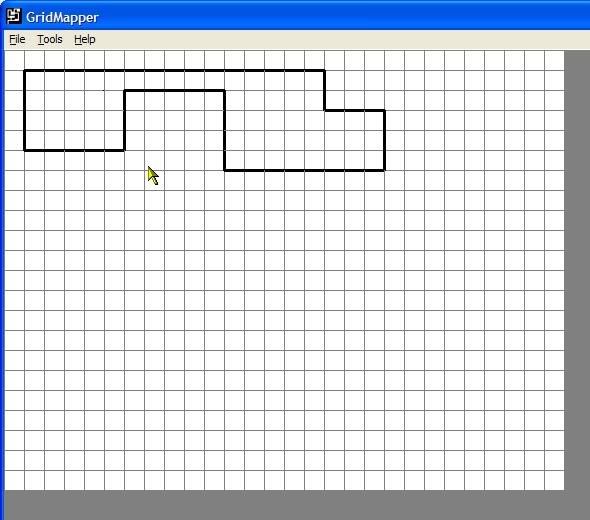
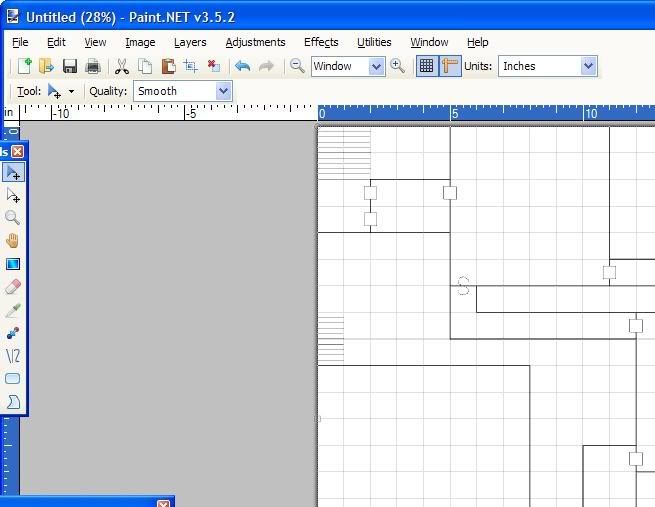
This leaves you with a nice clear screen that looks like a dead-tree sheet of graph paper.
![]()
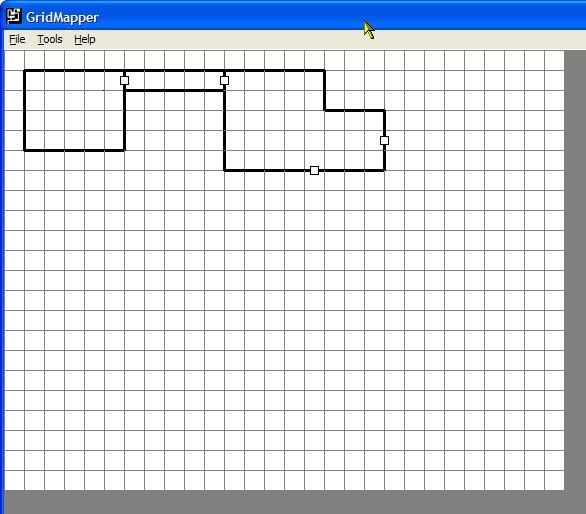
Now we want to start drawing our walls, just as if we had a pencil in our hands and were drawing on graph paper. Select Tools->Fill Wall
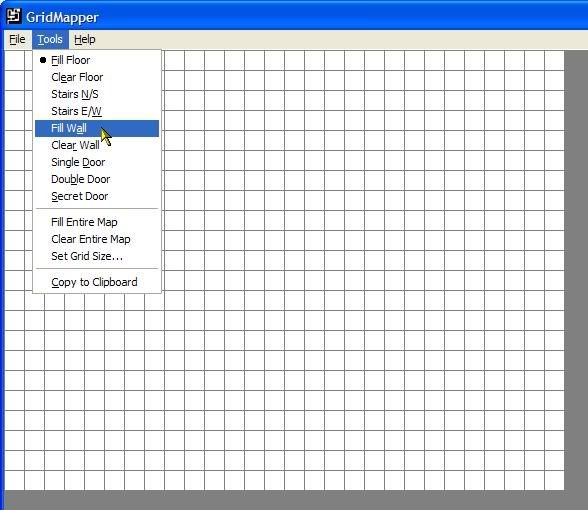
Start drawing your rooms. If you’re a 4E DM, you’re going to want to be careful how you draw rooms. Keep in mind that movement is very important in 4E, and a lack of mobility will hinder your PCs’ ability to be effective. Try to make rooms in the neighborhood of 6×4. Some can be smaller and some bigger, but try not to go too much smaller. A 2×2 room looks nice on the map, but it means that the PCs will be cramped, bottle-necked, and some will be taken completely out of the fight (due to lack of line of sight.) Make your rooms big. There is enough room, and your players won’t know it, but they’ll appreciate it.
Simply click the border of the square you want your line on. You can also click and drag for longer walls.
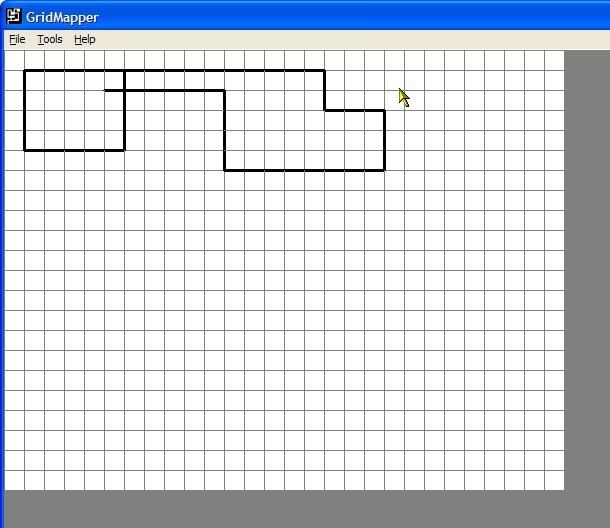
As you can see above, I made a mistake as I dragged a wall line too far into the room on the left. No problem. Just clear the wall and continue on. Choose Tools->Clear Wall.
![]()
Click the borders you want to “erase.”
Once you’ve added your rooms and connected them with hallways, feel free to add in some doors. I tend to be liberal with my application of doors. There’s nothing like coming to a closed door in a dungeon. Who knows what’s beyond, just waiting to pounce!
Select Tools->Single Door (or Double Door, or Secret Door – though you’ll usually not want to print out the secret door on the final map, which your players will see. Not very secret at that point.)
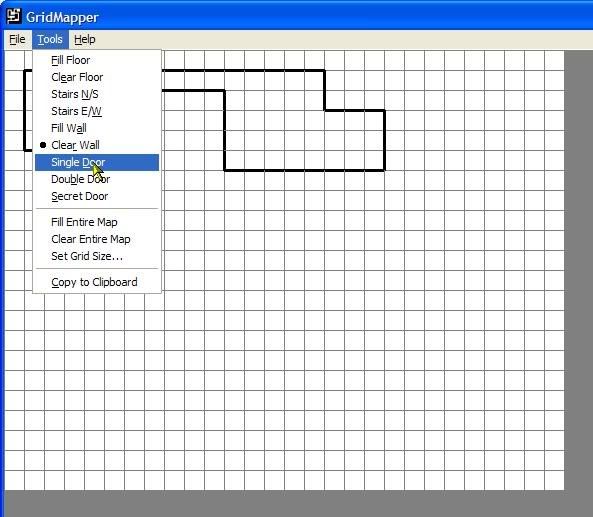
Paint doors onto square borders, just like walls. The doors will always appear in the middle of the sqaure’s border that you paint.
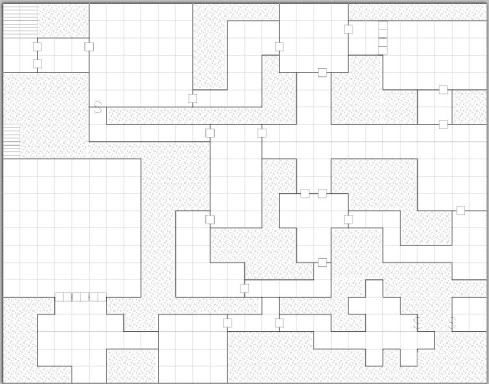
Continue painting your walls and doors until you’ve created a map you like. Here is a map I had already created for my group.
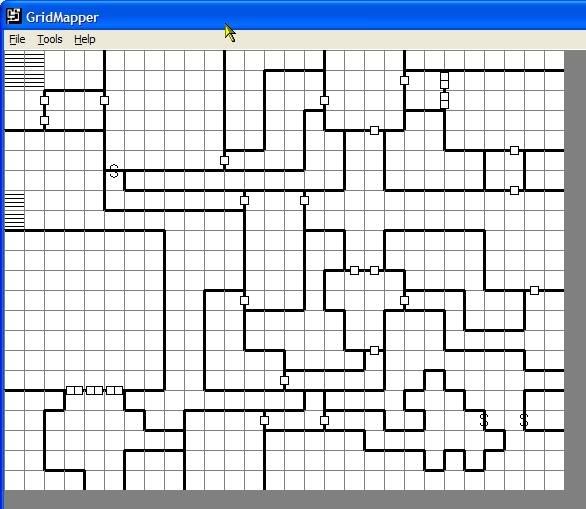
It’s a little bit hard to look at right now, and is not at all ready for use with miniatures. For that, we’ll need to bring it into an image manipulation program and work with it a little bit.
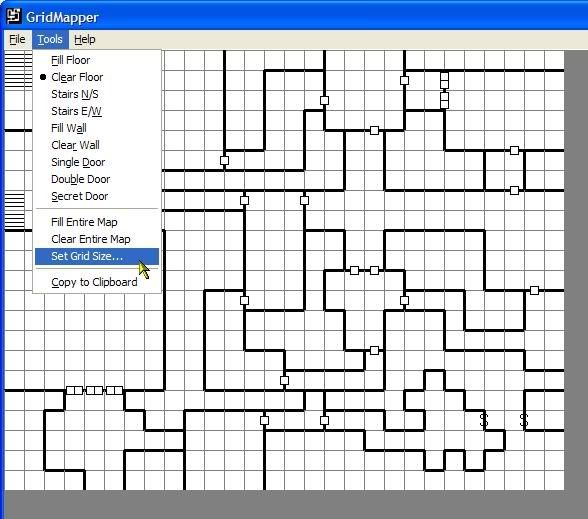
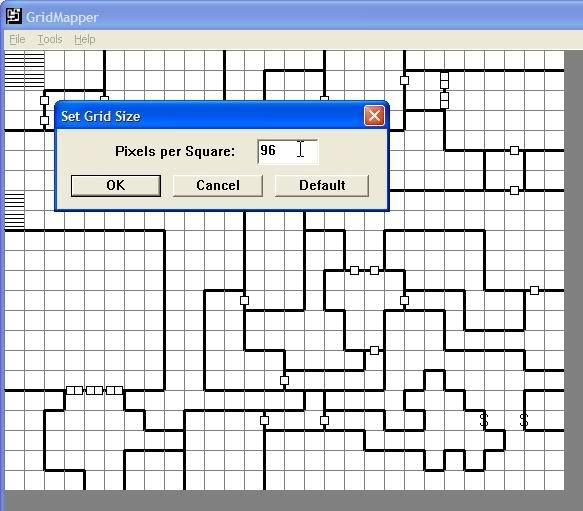
If you are not using GridMapper to print 1″ scale maps for use with miniatures, you can skip this next step. If you’re going to use it on the table, however, click Tools->Set Grid Size.
The default size is 20 pixels per square, which is fairly small.
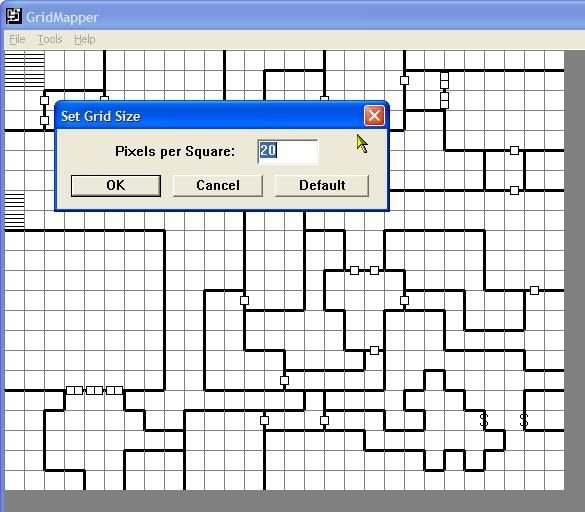
I’ve had conflicting reports, but I have found that 96 Pixels per Square is the right setting to get squares that are one inch per side. Type 96 into the box, and click OK.
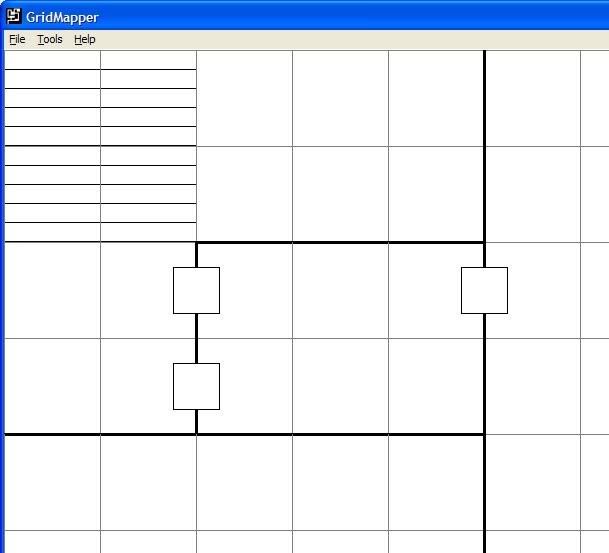
Your map will expand, and you’ll see far less of it on-screen. Don’t worry, all of your hard work is still there.
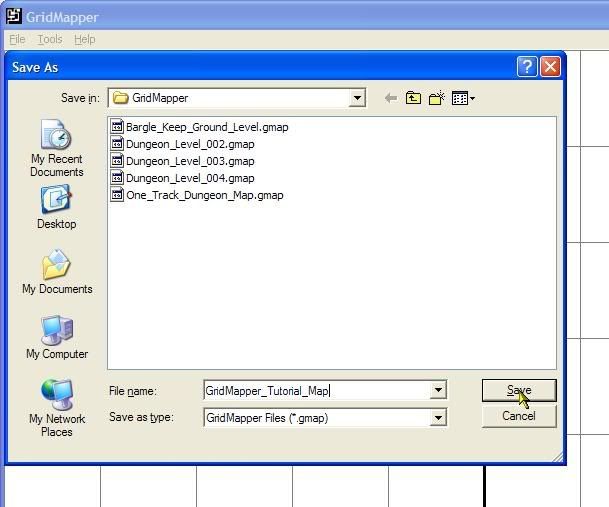
If you haven’t yet saved your work, (and why haven’t you? Repeat after me: “Save early, save often.”) let’s go ahead and click File->Save. The application uses a .gmap extension.
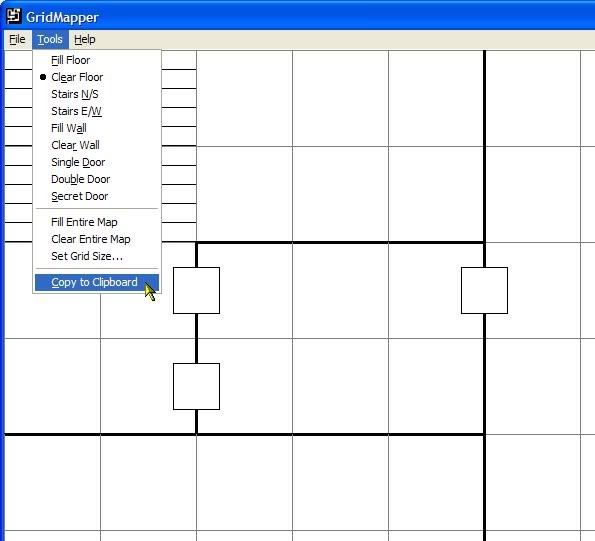
Now we need to “export” the map. Click Tools->Copy To Clipboard.
I use Paint.Net. I’m on Windows and it’s a pretty robust application. It also has the price point I’m always looking for, FREE! I assume the steps would be very similar in other image manipulation packages, but not in MS Paint, which is the program that comes with Windows. Paint.Net is a completely different program, and if you’re not familiar with it, go to http://www.getpaint.net/ and grab yourself a copy.
Open Paint.Net, and create a new image. Use Control+V on your keyboard to paste the map onto the blank canvas. When the Paste dialog comes up, choose the option to Expand Canvas. Doing this allows the map to remain at 1″ per square.

If you enable the Ruler from the View menu, you’ll see that each square is one inch per side.
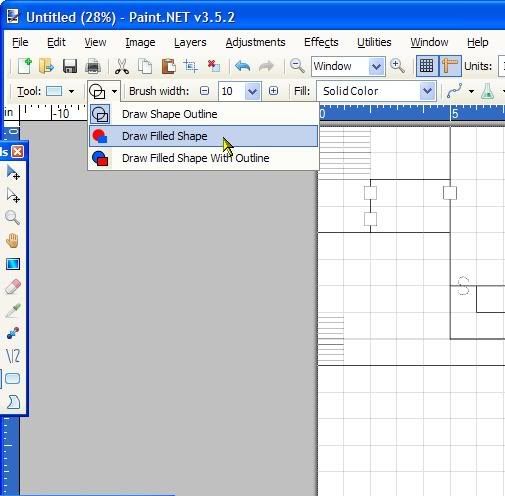
On the Tools panel floating on the side (open it from the View menu if it isn’t currently visible) select the “Rectangle” tool.

In the toolbar, change the “Brush Width” to 10, and click the triangle next to the overlapping circle and square. Select “Draw Filled Shape” from that menu list.
In the “Fill” drop-down box, select “Percent 05”
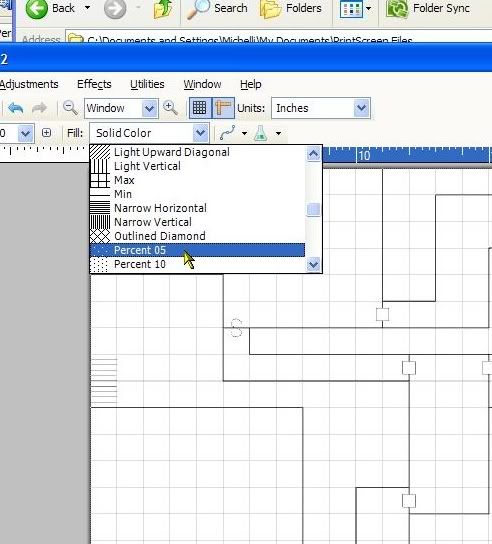
Use the rectangle tool to start filling in the squares that are not part of your rooms/hallways/stairs by clicking and dragging boxes inside the area to be covered. This will result in the same effect that “Fill Floors” would have within GridMapper, except that it will use significantly less ink.
Work slowly and use some care. If you overdraw a box, just hit Control+Z on your keyboard to erase that box and redraw it. It’s far less work than it sounds. Really.
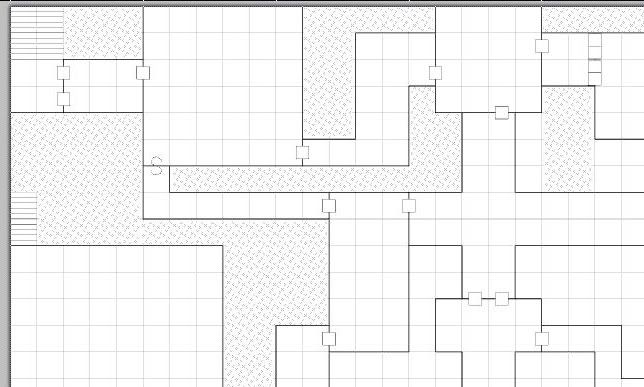
Continue working until you’ve filled in all the spaces that are not meant to be used by PCs.
Let’s save our map!
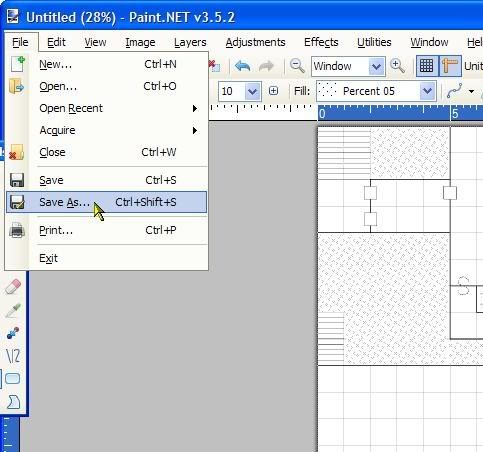
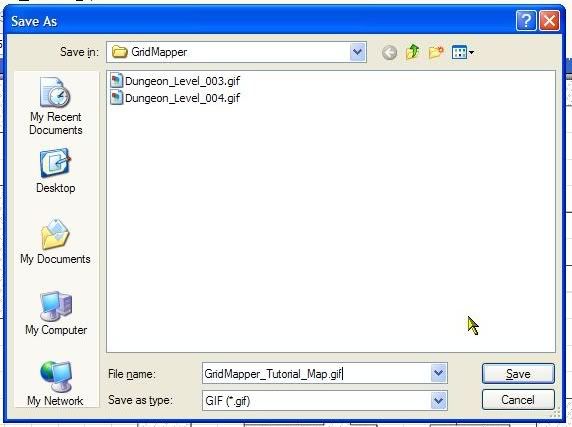
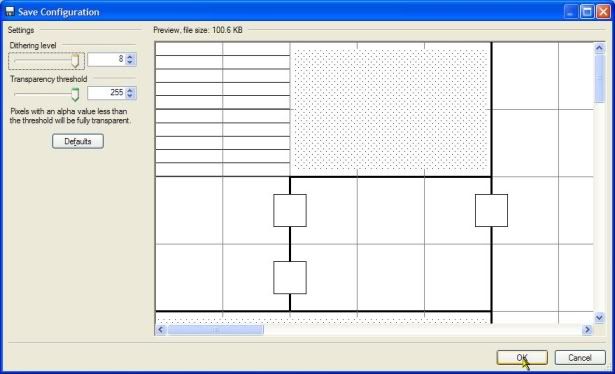
I change the “Save As Type” to GIF. That format seems to get me the best results, and imports into PosteRazor, which we will look at next.
Now that you have your map saved, open PosteRazor! Wait, you don’t have PosteRazor yet? Oh my. Well, you had better head over to http://posterazor.sourceforge.net/ and grab your FREE copy of this awesome software. Don’t worry, I’ll wait.
Oh! You’re here. Okay, let’s get back to PosteRazor.
By the way, it’s even useful for converting maps such as those WotC posts as part of Dungeon magazine to table-top use. I won’t get into that now. I think someone already did a tutorial on that, @newbiedm perhaps?
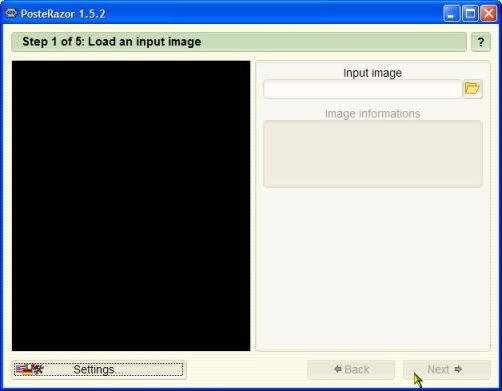
Open PosteRazor. Click the folder icon near where it says “Inpot Image” and navigate to your saved .GIF version of the map. Click Next.
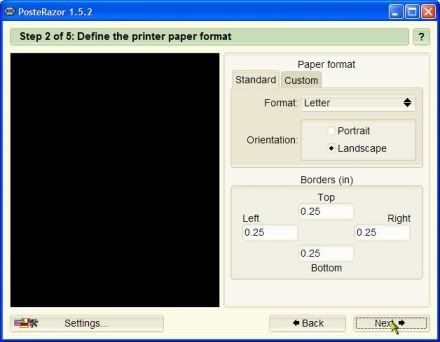
I tend to print on Landscape, in Letter size, but your choice may vary. I also use quarter inch borders all the way around.
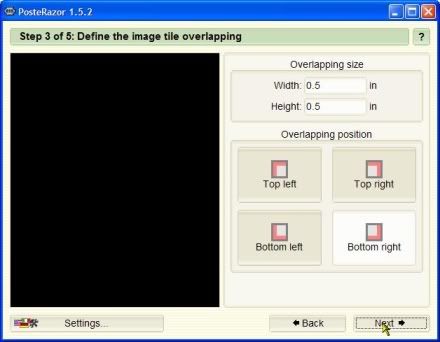
I allow one half inch overlapping, on the bottom right.
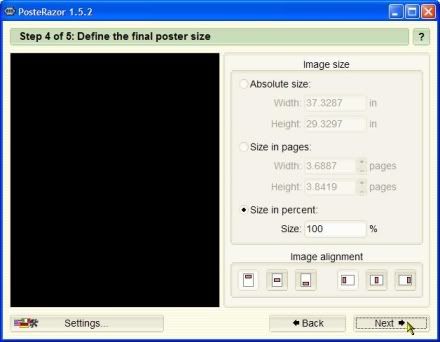
Leave the final poster size as 100 Percent. You’ve already assured your map will be 1″ squares.
On the final PosteRazor screen, you can save the “poster” and “Launch PDF application” which you want to do. Hopefully you have Adobe Acrobat installed. I’ll just assume that if you don’t you’re probably chiseling on your stone slab right now and none of what I’m writing matters to you anyway.


The map will finally open in Acrobat (or whatever your default PDF application is if you hate Adobe, okay Mr. Jobs?)
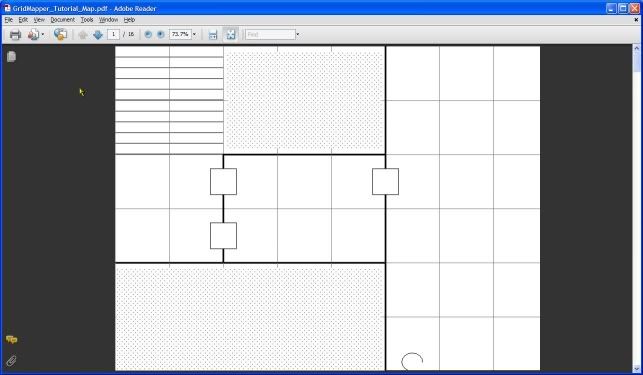
Go ahead and print it out. It will take a few minutes to get a feel for where you have to overlap sheets, but once you’ve done it a couple of times, it will be second nature.
That’s about it. Enjoy!
Was this tutorial useful to you? How can I improve it? Would you rather I just shut up and not waste cyberspace? Leave a comment and let me know!
Many thanks! I’m wracking my brain for a decent back story right now and hope to put your tutorial to good use by Friday night.
Good luck! If I can be of assistance, let me know.
Nice tutorial! I think GridMapper is exactly the tool I was looking for a few weeks back. I liked creating maps in GameTable, but I was moving to MapTool and didn’t know how to create maps there as easily, so I was looking for a grid drawing program that was free and easy to use. I eventually was pointed toward the excellent MapTools video tutorials that showed me how to draw maps within MapTool, which I absolutely love now (you might check it out).
But your info about PosteRazor is way cool. I’ve just signed up to DM my first-ever in-person game (my other games have been online), and I only have one Chessex mat and will need three battle areas. If I can print them out on paper that’s appropriately sized and tape the pages together to make poster maps, that would be a great solution! I’m definitely going to give it a try.
I’m a bit of a luddite when it comes to mapping. Still enjoy sketching stuff out by hand. I might take a whirl at this program though. Thanks tons for taking the time to post this tutorial.
Wow. Just made my first poster map — worked great. I think you probably just changed the way I DM.
I just wanted to say that I made some maps in MapTool, resized them to one-inch square scale in Photoshop, then used PosteRazor to make them into PDF posters, and it worked like a charm! Thanks for the enlightenment!
Glad to hear people are getting use out of this tutorial, whether it be with all of the tools, or just some!
FYI, I use Paint.Net coupled with PosteRazor to print out the maps that Wizards puts in Dungeon magazine as well. I scale up the maps to 1″ in Paint.Net, then print them via PosteRazor. They lose quite a bit of resolution, but still, it’s not a terrible option.