Hello to all of you gamers out there in RPG-land. I apologize for the long delay in posting here. I’ve been dealing with some recent personal tragedy and haven’t been able to spend as much time as I would like writing and gaming. But… since I dislike posts that apologize for not posting, let’s get on with the real topic of the day: cheap gaming supplies.
In these times of economic crisis, it seems to be getting more and more difficult for most of us to keep up with all of the new products that get released for our favorite hobby. Because of this, I thought it may be a good idea to show you how I cope with a lack of funds while still maintaining a healthy RPG collection. One of the things I like about being a DM is that it gives me an excuse to collect toys… ahem, I mean, a chance to collect items to grow my hobby.
I know there are plenty of complaints out there about how 4e is a miniatures driven game, but hey, I actually like to use minis in my game. As a result, I try to have a healthy number of minis, maps, and markers on hand to bring to the table for everyone to use. One of the ways I do that is by shopping at thrift stores.
Yes, I said thrift stores. For example, I found this little gem last time I went to my local thrift store:

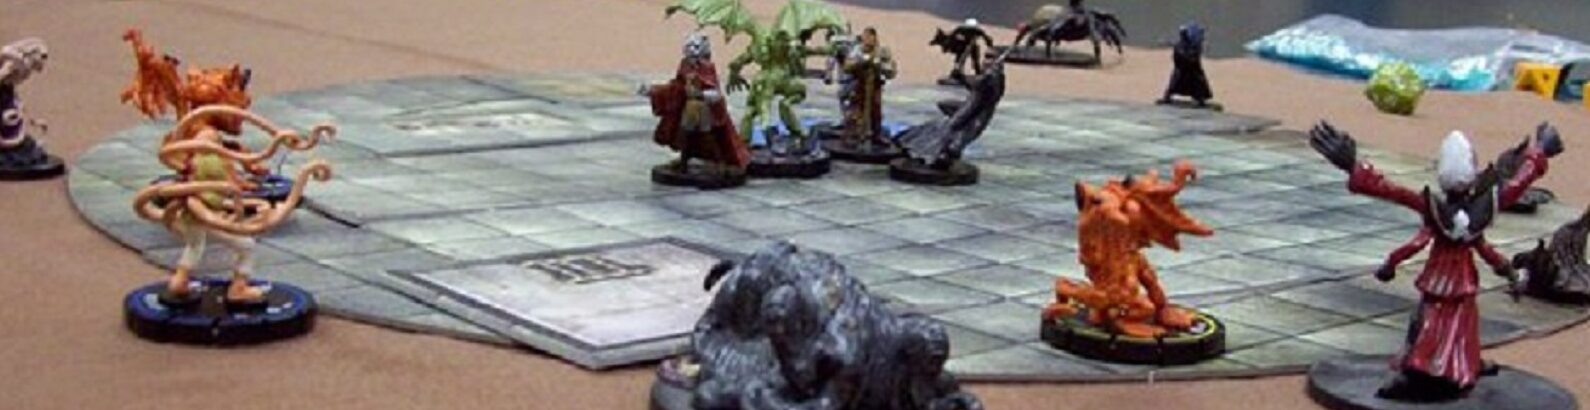
I know what you are thinking… it seems weird, doesn’t it? I mean, I am older than 6 years, and that is the stated age limit on the box (1.5 to 6 years, in case you can’t read it in the picture). On the other hand, I paid very little for this set of natural wooden blocks, and these babies do a lot to enhance my dungeon tiles. They make for great archways, pillars, and walls, plus a whole lot more. Here is an example of wooden blocks enhancing a crypt scene:


Here is an example of some of these blocks doubling as 3D debris:

Nothing fancy, but they have an amazing effect on the players. I notice that none of them have to ask if there is difficult terrain right there, which is what usually happens when a tile has a triangle symbol on it, but I digress… the box only cost me $1.99 – thank you Salvation Army (salvationarmyusa.org).
At the thrift store I also look around for several types of things:
1) Cheap Coasters. You know, the things you are supposed to put glasses on so that they don’t ruin the furniture… Any sort of smallish coaster works on a map. For example, you can paint/color one blue and call it water (lake/pond/fountain/pool).
For example, this picture shows the before and after shot of some cheap plastic coasters I bought for $0.99 at a local thrift store and colored with a blue permanent marker after removing the cork.

This next view shows one of the advantages to using markers to color the plastic blue; since the markers dry relatively transparent, you can see the 1″ square grid of the dungeon tile through the coaster (under the “water”) – this is extremely helpful if there happens to be something lurking in there.

This angled view shows you just how well this little trick works. It’s amazing how much the coaster looks like it has water in it. A little bit of blue permanent marker is all it takes (more on these markers later).

2) Creatures. While in the thrift store, I have often run across small plastic animals in plastic bags, usually selling as a batch for $0.99. These bags can have all types of creatures in them, and very cheap! Here is a bag that I recently got for $0.70:

Now, of course, not all of these creatures are usable. Notice that I placed a couple of standard DnD minis to the right of the bugs in the picture below (for scale). The butterflies near the top, the orange fish, the yellow dinosaur, and the red rooster will probably not fit into my campaign. However, the horses look good, the shark is the right size, the snakes work well as giant constrictors, and I’ve already used the frog, lizards, and a couple of bugs in a game (I was short on crocodile minis and we used two lizards and the large blue bug near the middle as stand-ins).

3) Any type of generic terrain. I have also seen generic terrain on sale. Usually people overlook this type of thing because they think it goes with a specific set of items or a boardgame. The whole point of going to the thrift store is that you find half-complete items and weird plastic things – this kind of stuff goes great with DnD (and other RPGs, but almost nothing else). Here are a couple of things I recently purchased:
The elephant works well as a giant elephant (on the scale of a huge creature) and the palm trees round out an otherwise boring desert scene.

The gray pieces below appear to be from a MacFarlane Toys set put out by Warner Bros. It is plastic and, given the MacFarlane connection, probably came with some sort of action figure when purchased new. They cost me a total of $0.99. Once again, I placed a couple of standard DnD minis in the pics for scale.

4) Last but not least, I look for anything small enough to sit on a 1″ grid map and look like it belongs there. Remember, we are talking about miniatures that sit on a 1″ base and are roughly an inch tall. It doesn’t have to be very big or very detailed to give the impression that it fits into the scene.
Enough with the thrift store, I think you get the point…
Another way that I try to cut costs is by shopping at my local craft store. I know, I know – those places are expensive, aren’t they? Well, it depends on what you are looking to buy…
As you know, there are a lot of important creature conditions in 4e that everyone needs to have knowledge about. For the players, it may be important to know which creatures are bloodied, or which are slowed/blind/flying/etc.; for the DM, it is important to know the condition of every living thing on the map. The best way to keep track in an easily visualized way is to use gaming condition tokens.
Basically, a gaming token is a thin, 1″ diameter round piece of material (usually plastic, wood, or cardboard), that can be placed under a miniature. This works because standard DnD 4e minis have 1 ” round, plastic bases that are relatively sturdy. The tokens are usually colorful and thick enough to be seen when placed under the mini. The miniature that represents a PC that becomes bloodied, for example, will often have a small red token placed under it so that everyone knows the PC is in the bloodied state.
There are several places to purchase tokens. One popular maker of tokens is Alea Tools (aleatools.com), a small company operating out of Colorado. I bought a set of their tokens a couple of months ago and I must say that I like them. They are high quality and come in a variety of colors. They can be purchased in 1″ or 2″ sizes, so they fit standard minis and large ones as well. A DM can buy a set of 24 (6 colors, 4 of each) for $14.99 + shipping and handling (~$4). So, about $20 for a quality set of tokens. A player can buy a multi-colored set of 10 tokens for $7.99 + shipping and handling. So, also a decent price for a high quality set of tokens for a relatively low cost.
Here is a picture of the player set that I bought:

I guess my problem, as a DM, is this: I don’t want to spend 20$ for 24 tokens. Plus, I would have to buy two sets so that I can get the reds and the blues (one set of 24 is either reds oranges and grays, or blues, dark blues, and purples, or the green spectrum). So if I wanted to outfit my gaming bag with enough of these to make them all worthwhile, I would have to spend ~$35 instead of $20. Not extremely expensive, but a bit too rich for my wallet at this time.
The tokens are magnetic and are partly meant to be used in a do-it-yourself sort of token making operation. There are how-to guides on their website and it looks like a neat little way to create sturdy, steadfast magnetic tokens for any game that you are playing. The problem is that I don’t need them for that purpose, but the cost of that benefit is built into the product.
This isn’t meant to be an indictment or critical slam of the product or the company. In fact, I rather like the tokens. The quality is very high and the company has a good reputation for a reason. My problem is that I just don’t need that fancy equipment for my games right now, especially during this penny-pinching time of year.
Here is my solution to the problem: A trip to Michaels – the arts and crafts store and a swing by the local dollar store on the way home. At Michaels (Michaels.com) I go to the small woodworking/crafting section and grab a bag of Lara’s Crafts 1″ circles (larascrafts.com). This is a bag of 26 (though my bag contained 27!) wooden 1″ diameter, 1/8″ thick disks that costs $2.99 and looks like this:

On my way home I stop by my local Dollar Store and pick up a generic package of colored permanent markers. These are, consequently, the same ones I used to color the plastic coaster I got at the thrift store. They aren’t Sharpie brand, but instead are a Japanese knock off brand called Shariuoe. You can get any brand that you like. Sharpie colors tend to be sharper and more ‘true’, but all we are going to do is color a bunch of round wooden disks, so I don’t think it’s that important to have rich, true color. Plus, Sharpies are expensive and the whole point of this is to get it done cheap – so pretty much any dollar store felt-tip permanent marker will do.

When I get home I open the markers and open the bag of wooden disks, and then color away. I did happen to take a pair of latex gloves out of the first aid kit so that I wouldn’t get permanent marker all over my fingers, but mostly that was just because I am impatient and wanted to just get these things done without worrying about having multi-colored fingertips.
Here is a picture of two single wooden tokens before and after color, sitting on a 2×2 dungeon tile:

Here is a picture of all 27 tokens after I made them red, blue, green, or black:

Here is a comparison shot of the Alea tokens and the wooden disks:

Here is a comparison with them under minis on a map. In this shot, the two figures on top have the wooden disks under them (one has natural wood and one red), and the two on the bottom have Alea Tools magnetic counters under them.

In the picture below, the two top figures have two home-made tokens (of different colors) under them while the lower blue/white figure has an Alea tools red token and a home-made black token under it. The final figure in this pic has a 1″ cardboard token under it.

So, I spent $2.99 + $1.00 + tax on my 27 wooden 1″ disks, totaling ~$4.30. Compared to the ~12$ Alea Tools tokens (for a player’s set of 10), or the ~20$ set of 24 tokens (the DM set), I saved quite a bit of money.
Note the red plastic counter (the counting chip just below the Ibixian in the picture with gray tiles above). I use that in my games to indicate if a creature is marked/cursed. Each PC gets their own color, so I know, for example, who has marked whom, since the fighter is green, the paladin is red, the warlock is yellow, etc.
These small chips come in a five color batch (25 of each color) for about $3.99. I bought them at my friendly local gaming store. They don’t work well as condition tokens because they are too small and thin to be effective in that capacity, but they do work well for markings and area effects. They are easily worth the $4 purchase price and are useful in many ways; here is a picture of some green ones on a battle map, depicting an area affected by a 3×3 blast spell:

Well, that’s all for today. I hope that you have gotten some useful ideas from this post – or at least that you feel you have gotten to look at some cool pictures!
My next post will be a review of Goodman Games’ Dungeon Crawl Classic # 59: Mists of Madness, which I ran as a one-shot session for my group last Friday. I will be combining the notes I took after reading the module with the thoughts I had while running the adventure (plus pictures!), along with some after-thoughts. It may end up being a two part post.
Until my next post, I wish you good gaming! (and a Happy Thanksgiving to you USA-ians in the crowd)!
~DM Samuel
![]()
Nice post! Always a fan of DIY gaming!
I bought a bag of those chips there at the end of the article… picked it up at gencon, use it in the same way you do, and also to mark auras.
Thanks!
Yeah, they come in really handy. When I first saw them at the store, I bought one package of 40 (I think) that were all one color. I had the idea that I would just be using them to remember marks, so I wouldn’t need more than one color… Then I used them in my next game and saw how awesome and unobtrusive they really were for marking and area notations and decided right then to go back and get the large bag of multi-colored ones.
Awesome.
Regarding the tokens: That reminds me of when I used to play the old Silent Death spaceship combat game. There was a rules variation if you wanted to run 3-dimensional space. To represent ships above the flat plane of the hex map itself, it suggested you use stackable chips of some kind, like poker chips or checkers. It worked pretty well. Might work well for DnD if you wanted to represent flying characters or else driders walking on the ceiling or something.
Yes, I think it would. I also have tokens that stack to represent height, but usually I use the iconoclastic pizza box ‘table’ to indicate flying… you know those white, 3-legged things in the middle of a pizza box? Once cleaned up they make great flight indicators.
Nice post. I’ve been on a cheap mini kick myself, after laying down almost three hundred dollars on the Paizo/WizKids Heroes & Monsters case. Now that I have no more money, I’m looking for any opportunity to save money. I’ve found some great dinosaurs at Dollar Tree stores, and drug stores. Haven’t tried thrift stores yet. I’ll have to make the rounds and see what I find.
Oh, I know what you’re talking about with those pizza tables. Last con I attended, someone ordered stacks of pizzas, and they were throwing away all of those wonderful little platforms. What a travesty. So I went around and gathered all of them I could find. Flip them upside down, cut off two legs, and they make great “torchbearer” markers. Put the mini on the little platform, and you always know who has the light source.